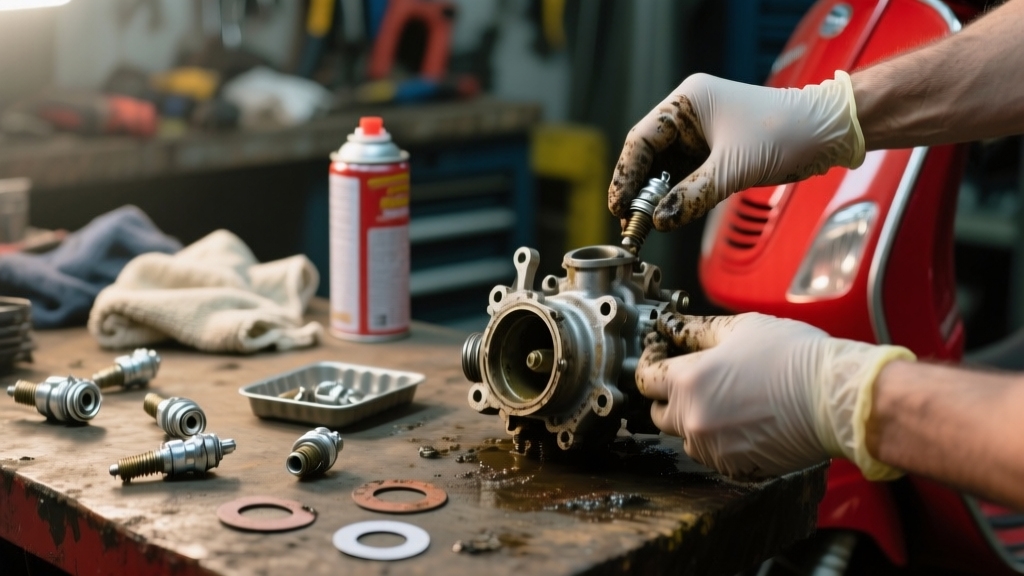
To clean your scooter’s carburetor, first disconnect the fuel line and remove the carburetor carefully. Disassemble components like jets, floats, and screws, handling small parts gently. Use carburetor cleaner and compressed air to clear all passages and jets, avoiding damage to delicate areas.
Reassemble the parts precisely, ensuring proper fit and adjusting the float height and mixture screws. Test the engine for smooth idling and fuel flow. For a detailed step-by-step process and maintenance tips, keep exploring further guidance.
Key Takeaways
- Disconnect fuel lines, drain the float bowl, and remove the carburetor carefully from the scooter for thorough access.
- Disassemble the carburetor by removing jets, float assembly, throttle slide, and screws, handling small parts gently.
- Soak jets in carburetor cleaner, spray passages, and use compressed air and micro drill bits to clear clogs without damage.
- Reassemble all components precisely, ensuring correct float height, secure screws, and proper routing of fuel and vacuum lines.
- Perform final checks by adjusting the idle and air-fuel mixture screws, refilling fresh fuel, and verifying smooth engine operation.
Tools and Safety Precautions for Carburetor Cleaning
To clean your scooter’s carburetor efficiently, gather essential tools: a jet cleaning kit with pins from 0.45mm to 1.50mm, small precision flat-head and Phillips screwdrivers, stainless steel brushes and needles, a 10-12 mm wrench for throttle cable fittings, and a carburetor cleaner spray safe for carburetor materials.
Always work in a well-ventilated space, wear gloves and eye protection, and disconnect the battery or ensure the engine is off to prevent accidental starts.
Work safely: ventilate well, wear protective gear, and disconnect power to avoid accidental engine starts.
Avoid metal wires or files inside jets to prevent damage and altered performance. Using specialized tools designed for small holes helps prevent damage to delicate carburetor parts and ensures thorough cleaning of small holes and jets.
Dispose of used materials properly, following local hazardous waste regulations. Organize your workspace with labeled containers or magnetic trays and protective covers to keep parts secure and clean.
Accessing and Removing the Carburetor From Your Scooter
First things first, you’ll want to start by taking off the body panels so you can get a clear view of the carburetor area. It’s a good idea to keep all the fasteners organized while you’re at it—trust me, it’ll save you a headache later. Remember to work in a well-ventilated area to avoid inhaling fuel fumes during this process.
Once you’ve got those panels off, the next step is to carefully disconnect the fuel and throttle lines. Just be mindful to avoid any spills; nobody wants to deal with that mess! Make sure to use the open-end wrench to loosen the throttle cable nut to avoid damaging the cable.
After that, you can move on to detaching the carburetor assembly. Just loosen its mounting points, and you should be able to remove it safely without any trouble. Easy peasy!
Removing Body Panels
Before accessing the carburetor, remove the seat and seat bucket by unscrewing the five bolts with a 10mm socket or ratcheting wrench. Keep all hardware organized to prevent loss. Using a magnetic tray or small container can help keep screws and bolts from getting misplaced during disassembly.
Lift the seat bucket to expose the body panels. Locate and remove screws and bolts securing the panels, typically Phillips or 8mm bolts. Unsnap plastic clips by moving them forward and down. Ensure the workspace is well-ventilated when removing panels to avoid inhaling any dust or fumes.
Proper ventilation is important to minimize exposure to harmful dust particles. Slide panels rearward carefully to avoid damage. Organize all removed parts for reinstallation.
| Panel Location | Fastener Type | Removal Technique |
|---|---|---|
| Side Panels | Phillips screws | Unscrew, unsnap clips |
| Under-tail Panels | 8mm bolts | Unscrew, slide rearward |
| Tail Light Area | Phillips screws | Remove screws |
| Clips | Plastic clips | Move forward, then down |
| Seat Bucket | 10mm bolts | Unscrew bolts |
Disconnecting Fuel and Throttle
When disconnecting the fuel and throttle components, first locate the fuel line at the carburetor inlet and loosen the hose clamp with pliers to carefully remove the line, catching any residual fuel in a container. Before starting, ensure the scooter is securely placed on its center stand to prevent movement during this process.
Next, disconnect the vacuum line, usually a smaller hose, from the carburetor and intake manifold. Note its routing for reassembly. Proper maintenance, including checking hoses for damage, is essential for preventing breakdowns.
Inspect both fuel and vacuum lines for cracks or brittleness and replace if necessary. Then, locate the throttle cable at the carburetor linkage. Use two 12mm wrenches to loosen the cable adjuster and locknut, and slide the cable off the linkage arm.
Secure the cable away from the work area to avoid damage. Check the cable for fraying or binding before reinstalling later.
Detaching Carburetor Assembly
Although the carburetor is usually located near the engine behind the air filter box, accessing it may require removing the seat or side panels on your scooter. Proper maintenance of components like the carburetor ensures safer and more efficient vehicle performance.
Begin by unbolting the seat bucket, typically held by five 10mm bolts. Then remove any obstructing plastic covers or air filter housing.
Disconnect electrical connectors near the carburetor. Next, loosen the clamps or mounting bolts, usually 8mm or 10mm, securing the carburetor to the intake manifold and throttle body.
Apply penetrating oil if needed. Carefully disconnect overflow hoses and vacuum lines before gently wiggling the carburetor free. Loosen clamps at the front and rear of the carburetor to ensure easier removal.
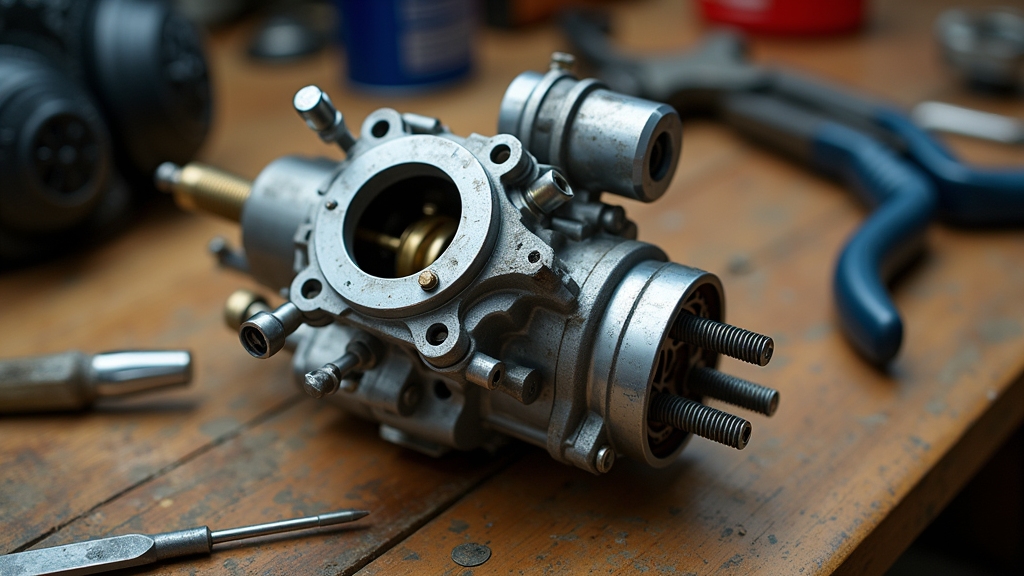
Avoid damaging soft aluminum or brass components during removal. Once detached, place the carburetor on a clean, flat surface, organize removed parts, and prepare for further cleaning and disassembly.
Disassembling the Carburetor Components
Once you’ve removed the carburetor from the scooter, you can begin disassembling its components by first detaching the float bowl screws and carefully removing the float assembly. Use the appropriate screwdriver to avoid damaging the screws, noting some models may have stuck or broken screws.
Next, unscrew the pilot and main jets, which regulate fuel flow at different throttle levels. Handle mixture screws and springs with care to preserve washers and O-rings. Keeping components organized is essential to avoid misplacement or damage during the cleaning process.
Then, twist and unscrew the throttle top cap to release the throttle slide, sliding it off the cable gently. Detach the throttle cable by wiggling it free without forcing. Use an open-end wrench when disconnecting the throttle cable to avoid damaging the nut.
Finally, remove the overflow tube and fuel line, inspecting for wear and noting routing for reassembly. Ensure the scooter is stabilized properly during this stage to prevent accidents. Keep all small parts organized throughout.
Detailed Cleaning Process for Carburetor Parts
To kick things off, you’ll want to carefully take apart the carburetor components. This includes the jets and screws, so you can really get in there and access all the critical areas.
Once you have everything disassembled, grab some carburetor cleaner and a can of compressed air. Trust me, these will be your best friends for clearing out any deposits or blockages in the jets and internal passages.
Proper maintenance like this restores engine responsiveness and efficiency. Regular cleaning also helps prevent issues like engine misfiring caused by clogged carburetor jets.
After you’ve given everything a thorough cleaning, make sure to dry the parts completely. Once they’re all nice and dry, it’s time to reassemble everything. Take your time here and ensure that each part goes back together precisely.
Finally, don’t forget to test the carburetor’s function afterward. This step is crucial to ensure you’re getting peak performance out of your carburetor.
Removing Carburetor Components
Before you can clean the carburetor thoroughly, you’ll need to remove its components carefully to avoid damaging delicate parts. Start by detaching any obstructive panels or seats. Remember that proper installation and securement are crucial for safety when reassembling parts.
Then loosen clamps securing the carburetor to the intake manifold and airbox. Disconnect throttle cables and fuel lines cautiously, inspecting cables for stiffness or damage to prevent reassembly issues.
Place a tray beneath to catch fuel draining from the float bowl after removal. This helps to drain fuel before opening to prevent spills and facilitate cleaning. Unscrew the float bowl screws and gently remove the float assembly by extracting the float pin or retaining screw.
Take care with the float needle. Detach throttle and choke cables or levers by loosening retaining screws, noting their orientation for reassembly. Inspect small rubber parts and springs, setting them aside safely.
Handle all parts precisely to ensure proper reassembly. Using regular maintenance can prolong the life of your carburetor and improve performance.
Cleaning Jets and Passages
Although removing the carburetor components is essential, cleaning the jets and passages demands equal attention to guarantee ideal fuel flow.
Start by unscrewing the main and pilot jets with a flathead screwdriver or proper tool. Inspect for varnish, debris, or blockages in the orifices. Just as measuring the proper seatpost length is critical for a smooth bike ride, ensuring jets are clear is crucial for optimal engine function.
Soak jets in carburetor cleaner for several minutes to loosen deposits, then spray thoroughly. Use a micro drill bit (#80) carefully to clear stubborn clogs without damaging or enlarging passages.
Blow compressed air through all jets and internal carburetor passages, including float bowl and vent tubes, to remove loosened debris. Wearing safety glasses and gloves during this process protects you from chemical exposure and debris.
Visually confirm light passes through jets and verify unobstructed airflow by blowing gently through them. Repeat cleaning if blockages persist. Properly cleaned jets and passages ensure consistent fuel delivery and ideal engine performance.
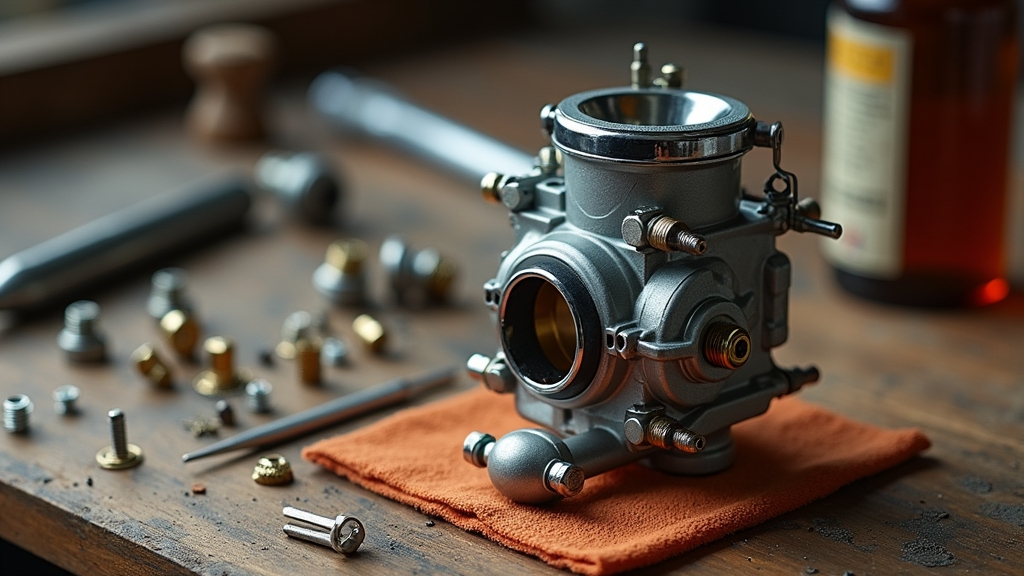
Reassembling and Testing Parts
When you’ve thoroughly cleaned each component, carefully reassemble the carburetor by reversing the disassembly steps. Ensure all parts are free of debris to avoid mechanical issues after reassembly.
Begin by installing the needle valve into its seat, ensuring proper alignment. Next, insert the float and secure it with the float pin, verifying free movement and correct float height.
Attach the float bowl firmly, using the correct screwdriver to avoid stripping screws. Place the diaphragm gently over the carburetor body, then secure the diaphragm cap with the appropriate screws to maintain tension.
Reinstall the auto enrichener, confirming the sealing O-ring is intact and properly seated to prevent air leaks. Before mounting the carburetor onto the scooter, attach new drain hose to ensure proper fuel drainage and prevent leaks during operation.
Finally, mount the carburetor onto the scooter, fasten hose clamps snugly, reconnect throttle and choke linkages, and route fuel lines correctly. Double-check all linkage connections to guarantee smooth throttle and choke operation.
Test throttle response and choke operation before starting the engine to confirm smooth, stable idling. Proper calibration and adjustment of these controls are essential for optimal scooter performance.
Reassembling the Carburetor Correctly
As you start reassembling the carburetor, carefully align and seat each component to guarantee proper function. Using the correct tools and following safety precautions can help prevent damage during the process.
Insert the slide straight to fit the needle without binding. Seat the diaphragm fully in its groove to prevent air leaks. Spray carburetor cleaner through all passages before reassembly to ensure all passages are clear.
Reinstall screws evenly using a JIS screwdriver, avoiding overtightening. Align the float and needle valve precisely for proper fuel flow. Secure external parts like the intake manifold and hoses firmly to maintain system integrity. Double-check all locks and clamps are engaged to ensure a secure fit and prevent leaks.
| Component | Key Action |
|---|---|
| Slide & Needle | Insert straight, avoid binding |
| Diaphragm & Cap | Seat fully, tighten screws evenly |
| Float & Needle Valve | Align for correct fuel flow |
| Intake Manifold & Hoses | Reinstall firmly, clamp securely |
Testing and Adjusting the Carburetor After Cleaning
Before you finalize the carburetor reassembly, you need to test and adjust its performance to guarantee proper engine function.
Begin by confirming spark and compression: spray carburetor cleaner into the intake and attempt to start the engine. If it runs briefly, ignition and compression are adequate. This carburetor cleaner test is useful because running on carb cleaner confirms spark without needing a fresh battery or starter.
Next, verify fuel flow by disconnecting fuel and vacuum lines from the petcock; apply vacuum to ensure fuel delivery. Adjust the idle screw for steady idling, then fine-tune the air-fuel mixture screw to achieve smooth throttle response without stalling.
Check float height to maintain correct fuel level, adjusting the float tab gently as needed. Finally, conduct multiple start-stop cycles and moderate revving to validate consistent performance under load before completing reassembly.
Maintenance Advice to Prevent Future Carburetor Issues
Although cleaning the carburetor restores functionality, maintaining it regularly prevents future issues and extends scooter performance. Use fuel stabilizers like Sta-Bil in every tank, especially before storage, to prevent gum formation and ethanol separation.
Prior to disassembly, loosen intake manifold hose clamps carefully to prevent damage to brittle rubber parts. Drain fuel and run the engine dry before long-term storage. Follow a strict maintenance schedule: clean the carburetor annually and replace fuel filters every 6,000 miles.
| Maintenance Task | Recommended Frequency |
|---|---|
| Carburetor Cleaning | Annually |
| Fuel Filter Replacement | Every 6,000 miles or yearly |
| Air Filter Cleaning | Every 3,000 miles |
Always use fresh, high-quality gasoline with low ethanol content. Periodically run carburetor cleaner additives and blow out jets with compressed air to avoid buildup. This proactive approach minimizes clogging and corrosion.
Frequently Asked Questions
How Often Should I Clean My Scooter’s Carburetor?
You should clean your scooter’s carburetor at least once a year, but increase frequency if you ride in dusty conditions or use ethanol-blended fuel.
If you ride daily, consider cleaning every six months. Scooters stored long-term or showing starting trouble, poor idling, or fuel inefficiency need carburetor attention sooner.
Always check your manufacturer’s guidelines for precise intervals, as neglect can cause performance loss, engine damage, and reduced efficiency.
Can I Use Household Cleaners Instead of Carburetor Spray?
You shouldn’t rely solely on household cleaners instead of carburetor spray. While mild cleaners like diluted Pine-Sol can clean external surfaces, they often damage rubber and plastic parts or fail to reach internal passages.
For thorough, safe cleaning, use carburetor-specific sprays or professional methods like ultrasonic cleaning. If you must use household products, remove sensitive parts first and limit soaking time to avoid corrosion and degradation.
What Symptoms Indicate a Clogged Carburetor?
If your scooter acts like it’s auditioning for a sputtering contest, hard starting, irregular idling, or stalling, you’ve got a clogged carburetor. Notice power drops or hesitation when you twist the throttle? That’s another red flag.
Increased fuel consumption despite your best riding efforts? Yep, that’s carburetor blockage messing with your air-fuel mix. These symptoms signal it’s time to clean those fuel passages before your scooter gives up the ghost.
Is It Necessary to Replace Gaskets During Every Cleaning?
You don’t have to replace gaskets every time you clean the carburetor. Inspect them carefully for cracks, tears, or deformation after disassembly. If they’re intact and undamaged, you can reuse them.
However, if you notice any damage or if leaks occur after reassembly, replace the gaskets immediately. Always handle gaskets gently during cleaning to preserve their integrity and keep replacement gaskets on hand for unexpected issues.
Can Carburetor Issues Affect Scooter Fuel Efficiency?
Yes, carburetor issues can considerably affect your scooter’s fuel efficiency. Dirt buildup, clogged jets, or deteriorated rubber parts disrupt the air/fuel mixture, causing incomplete combustion and increased fuel consumption.
You’ll notice harder starts, poor acceleration, and engine flooding, all signs of inefficiency.
Regular maintenance, including cleaning and replacing worn components, guarantees proper fuel metering and peak performance. This prevents excess fuel waste and reduces operating costs.
Routine Maintenance: Your Key to a Longer-Lasting Scooter
Regular carburetor maintenance can boost your scooter’s performance considerably. Did you know that a clean carburetor improves fuel efficiency by up to 20%?
By carefully following these steps: removing, cleaning, and reassembling, you’ll guarantee ideal fuel flow and engine response. Remember to test and adjust after cleaning to avoid running issues.
Keep up with routine maintenance to prevent buildup and extend your scooter’s lifespan effectively and reliably.