As any cyclist knows, having a good bike rack is essential for bringing your bike with you on trips. But what do you do if you need to attach a light board to your bike rack? Luckily, there are a few simple steps you can follow to make sure your light board is securely attached to your cycle carrier.
Throughout this article, we’ll cover how to attach a light board to a bike rack. We’ll go over what supplies you’ll need to attach the light board, and how to secure it in place. With these tips, you’ll be able to safely and easily install light boards on your bike rack, so you can hit the road with confidence.
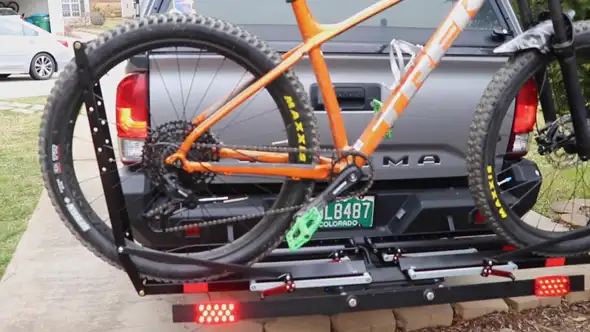
How to Attach a Light Board to a Bike Rack: Safety Guide
Here we will discuss the steps to be taken in order for a light board to be attached to a bike rack:
Supplies Needed:
- Lightboard
- Bike rack
- Screws
- Nuts and bolts (optional)
- Zip ties (optional)
Step 01: Pick the Right Light Board
When choosing a light board, the first thing to consider is what type of bike rack you have. If you have a hitch-mounted bike carrier, you’ll need a light board that attaches to the hitch. If you have a bike rack mounted on the roof, a light board needs to be attached to the roof.
There are also trunk-mounted and spare-tire-mounted bike racks, but these are less common. Once you have decided which bike rack you need, you can narrow down your choices.
Step 02: Make Sure It’s Easily Installable
If you are looking for a light board that is easy to install and remove, then you should consider a magnet-mounted light board. These light boards attach to the metal surface of your bike rack with powerful magnets, and they can be quickly removed when you are not using them.
In case you need a more permanent solution, you should consider a bolt-on light board. These light boards require more time to install, but they are more secure and less likely to be stolen.
Step 03: Bike Rack Selection
Once you have chosen the right light board for your bike rack, you need to choose the right bicycle rack for your vehicle. You should choose a compact bike rack if you have a small car. You should choose a full-size rack if you own a larger car. You should also consider how many bikes you want to be able to transport.
A trunk-mounted bike rack will suffice if you only need to transport one or two bikes. If you plan to transport four or more bikes, then you should choose a hitch-mounted or roof-mounted bike rack.
Step 04: Secure the screws
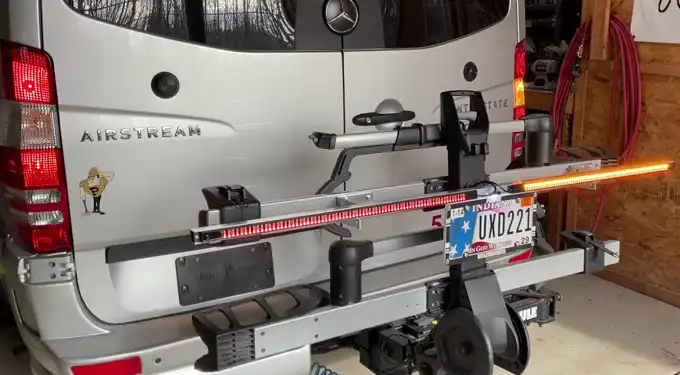
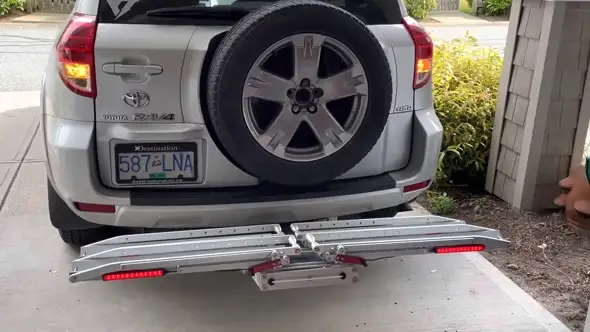
To mount a light board to a bike rack, you will need to remove the screws from the light board. Once the screws have been removed, you can slide the light board onto the bike rack. Ensure the board is firmly attached to the rack before screwing it. You may need to change the position of the screws to get a tight fit. Once the board is in place, use the screws to secure it to the rack.
Make sure that the screws are tight, so the light board does not come loose while riding. When attaching a bike rack to a light board, it is vital to make sure that the board is positioned correctly. The board should be positioned so that it is level with the ground and so that it does not obstruct your view while you are riding.
Step 05: Check for Errors
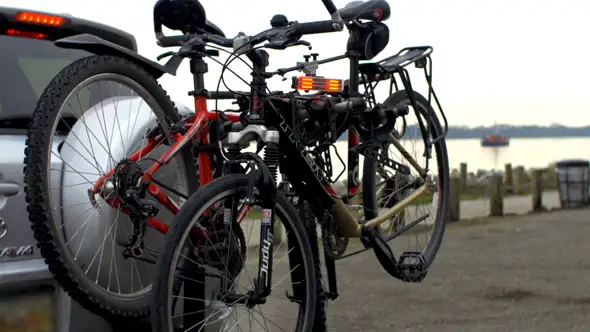
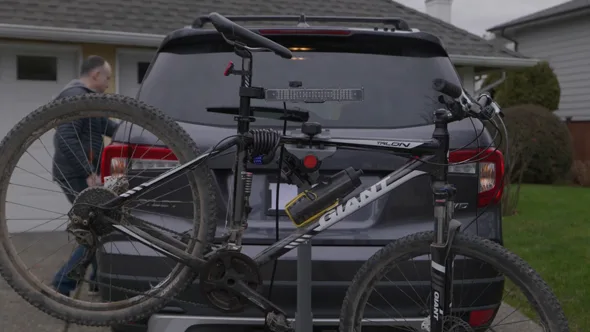
It is important to make sure that your bike light is correctly attached to your bike rack before you hit the road. A loose or detached light could pose a danger to you. Always inspect your light board and rack before heading out for a ride to avoid this.
Ensure the light is securely fastened and the batteries are properly installed. If you notice any damage, such as a loose wire or cracked lens, replace the light before riding. By taking a few moments to inspect your lights, you can help ensure a safe and enjoyable ride.
Ensure the rack is clean and free of rust or other particles. The last thing you want is for your new light to fall off mid-ride because of a faulty attachment. Also, check that the bolts attaching the rack to your bike are tight. By taking these simple precautions, you can have a fun and safe biking experience.
What Type of Light Board Do I Need For My Bike Rack System?
There are many different types of light systems for bike racks. The most popular are LED lights, which are bright and easy to install. Solar-powered lights can also be used to recharge batteries during the day.
If you live in an area with a lot of snow, you may want to consider a battery-operated light system that can be used year-round. No matter what type of light system you choose, make sure that it is compatible with your bike rack system.
Which is The Best Place To Mount The Light Board On My Bike Rack?
Before you can even begin to mount your light board on your bike rack, you’ll need to do some preliminary planning. You’ll need to consider where the light board will be positioned about the rack, along with how it will be secured. If possible, it’s best to position the light board to be easily visible to other drivers without being obstructed by the rack itself.
You’ll also want to ensure the board is securely fastened to the rack, so it doesn’t rattle or come loose while you’re riding. The best way to achieve both goals is to use a quick-release mounting system. Quick-release systems allow you to easily adjust the position of the light board and keep it secure while you’re on the move. With a little planning, you can ensure that your light board is mounted safely and effectively.
What Should I Do If My Light Board Stops Working Properly?
You can try a few things to fix your light board if it stops working effectively. First, make sure all connections are secure. Next, check the power supply to make sure it is working correctly. If those things work out, you may need to replace the light board.
You can purchase a new light board at most hardware stores. Be sure to take your old light board with you so that you can find the right replacement. In the end, if you are still having issues, you may need to consult an electrician.
Other Ways to Install a Light Board on a Bike Rack
A light board can also be attached to a bike rack in a variety of ways, including the following:
Toe-Straps
Attaching a light board to a bike rack with toe-straps is a cheap and easy way to increase your visibility on the road. Toe-straps are also relatively sturdy and will not come loose easily. Light boards can be attached to the toe-straps of the bike rack, first make sure that the rack is clean and dry. Then, position the light board on the rack so that it is centered and level. Next, take the toe-strap and loop it around the rack, passing through the holes in the light board.
Tighten the strap so that it is snug but not too tight. Repeat this process for the other side of the rack. Lastly, check that the light board is secure before you start riding. By following these simple steps, the light board stays in place while you ride, giving you extra safety on the road.
Clip Straps
If you’re looking for a way to attach light boards to your rack, clip straps are a great option. Clip straps are easy to use and provide a secure attachment point for your light board. They’re relatively inexpensive and can be found at most hardware stores. To use clip straps, simply thread the strap into the light board holes and then clip the ends onto the bike rack.
It may be necessary to adjust the positioning of the clips to get the best fit, but once they’re in place, your light board should be securely attached. If you’re concerned about the safety of your light board, you can always add an additional layer of protection by zip-tying the clips to the bike rack. By using clip straps, you can rest assured that your light board will stay securely in place, even on bumpy roads.
Bungee straps
One popular method is to use bungee straps. Bungee straps can be easily used, and they provide a secure connection between the light board and the bike rack. Plus, they’re also relatively inexpensive. To attach a lighting board to a bike rack using bungee straps, first, attach the straps to the corners of the light board.
Next, loop the straps around the bike rack and secure them in place. In the end, adjust the tension on the straps so that the light board is securely mounted to the bike rack. If you follow these straightforward steps, you can easily and affordably secure a light board to a bike rack.
What To Do Next?
After strapping a bike rack to a light board, this is important to test the connection before heading out on the road. The light board should illuminate, indicating that it is receiving power from the car’s battery.
If the board does not light up, check the connections and make sure that they are secure. Once everything is in working order, hit the road and enjoy the ride.
This article is intended to be helpful to you. If you have any further questions, please feel free to reach out to us. Good day and thanks for reading.