If you own a vehicle with a Fiamma bike rack, then you know how beneficial it is to have a quick and easy way to transport your bikes. But if you no longer need it, or if you’re moving to a new location, removing it will be necessary.
Fiamma is a leading manufacturer of sport and leisure equipment for the caravanning and recreational vehicle industry. One of their most sought-after products is their bike racks, which allow you to easily transport your bicycles with you on your travels.
Then again, there may come a time when you need to know how to remove a Fiamma bike rack. Maybe you’re done using it, or maybe you just need to make some repairs. In this blog post, we will try our best to guide you throughout the process. Read on to learn more.
How to Remove a Fiamma Bike Rack: Detailed Process
- It’s important to park your vehicle on a level surface and set the parking brake. You don’t want your vehicle rolling away while you’re removing the bike rack.
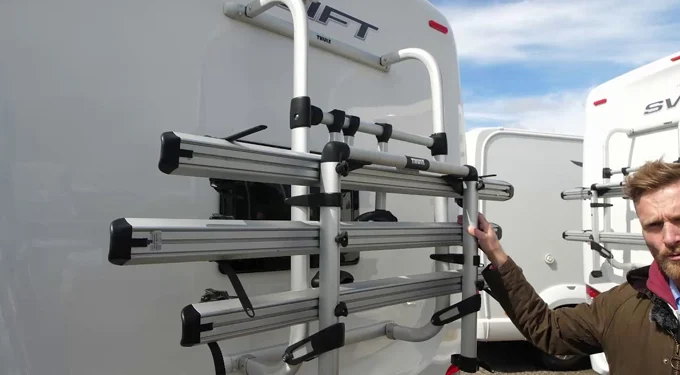
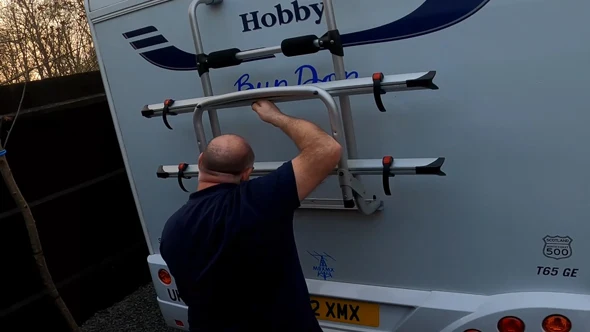
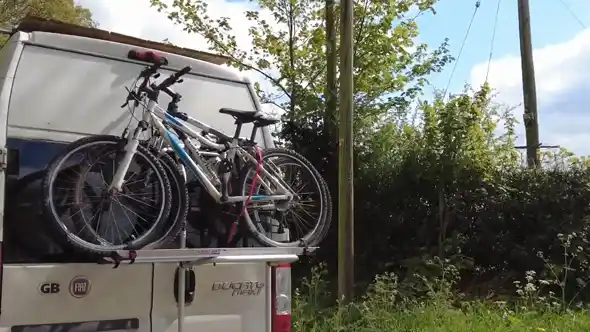
- Locate the main support bracket that is mounted to the underside of your vehicle. Most vehicles have the main support bracket mounted to the underside near the rear bumper. This bracket helps to support the weight of the vehicle and distribute the load evenly.
- If your Fiamma bike rack is attached to your vehicle with bolts, begin by removing the bolts with a wrench. In order to release the bolts that attach the support bracket to your vehicle, you will need either an Allen key or socket wrench.
- Some vehicles have brackets that need to be removed in order for the rack to come off. For, Once the bolts are taken out, you will be able to lift the bracket off of your vehicle after that.
- With the support bracket removed, you should now be able to see the two crossbars that make up the frame of the bike rack. These crossbars are what provide stability and support for the bikes. In most cases, they will be made of metal or aluminum and connected to the frame with brackets or clamps.
- If you are having difficulty finding the crossbars, take a look at the instructions that came with your bike rack. They should be able to help you locate them. Once you have found the crossbars, you can proceed to the next step.
- Using a socket wrench or Allen key is the best way to loosen the bolts that secure the crossbars to the bike rack legs, so it is recommended that you should use them accordingly.
- Once all of the bolts are removed, you can now take the bike rack off of your vehicle. Make sure to safely store all of the parts so that you can reassemble it later if needed. Also, disconnect any wiring that may be attached to the rack.
Why You Might Want to Remove Your Fiamma Bike Rack
Here are a few reasons why you might consider removing the Fiamma bike rack.
- You no longer ride your bike: If you’ve given up cycling, then there’s no reason to keep your bike rack installed. Not only will it be an unnecessary eyesore, but it could also damage your car if it’s not properly secured.
- You need to use your car’s trunk again: Many bike racks block access to the trunk, making it difficult to load groceries or luggage. If you find yourself needing to use your trunk more often than not, it might be time to remove the bike rack.
- You’re selling your car: If you’re selling your car, you might want to remove the bike rack to make it more appealing to potential buyers. A clean and uncluttered car will always sell better than one with a bulky and cumbersome bike rack attached.
- You’re moving to a new house: Whenever you move to a new home, chances are you won’t have as much space for storing your bikes. In this case, it might be best to remove the bike rack and keep your bikes inside instead.
- You want to change up your style: Just because you had a bike rack yesterday doesn’t mean you have to have one today. If you’re looking for a change, don’t be afraid to ditch the old rack and try something new.
What to Do With Your Fiamma Bike Rack Once It Is Removed?
If you no longer want or need your Fiamma bike rack, there are a few different options for what to do with it. You could sell it, either online or at a garage sale. You could also give it away to someone who is moving and needs something to transport their bikes with, or even to a local charity.
If the rack is in good condition, you could also donate it to a local school or community center. Another option would be to recycle it, although this may not be possible depending on the materials the rack is made of.
Whatever you decide to do with your old Fiamma bike rack, make sure that it goes to a good home where it will be used and appreciated.
How to Prevent Damage to Your Vehicle When Removing a Fiamma Bike Rack?
Whenever you remove a Fiamma bike rack from your vehicle, it is important to take measures to prevent damage.
- First and foremost, always consult the manual that is included with your bike rack. Each model is slightly different, and there may be specific instructions that you need to follow in order to avoid damage.
- Make sure that the area around the rack is clear before starting. This will help you avoid any potential scratches or dents as you remove the rack.
- Use two hands when removing the rack from your vehicle. One hand should be holding onto the back of the car while the other hand removes the bolts that hold the rack in place.
- Gently lower the bike rack down from your vehicle, being careful not to bang it against the car. Place it on a soft surface such as grass or a towel so that it doesn’t get scratched.
- Once the bike rack is off, take a look at it to see if there is any grit or particle buildup. That could potentially scratch your car if you’re not cautious.
- Give your car a once over to make sure that there is no damage from removing the rack. If everything looks good, then you’re all set.
Are Fiamma Bike Racks Easy to Remove?
Fiamma bike racks are designed to be easy to remove, with some models featuring a quick-release system that allows you to detach the rack from your vehicle in seconds. This is ideal if you need to quickly access your trunk or hatch or if you want to remove the rack when it’s not in use.
Some Fiamma bike racks also come with built-in ramps, which can make loading and unloading your bikes a breeze. Overall, Fiamma bike racks are excellent options for those who need a reliable and easy-to-use rack for their car or SUV.
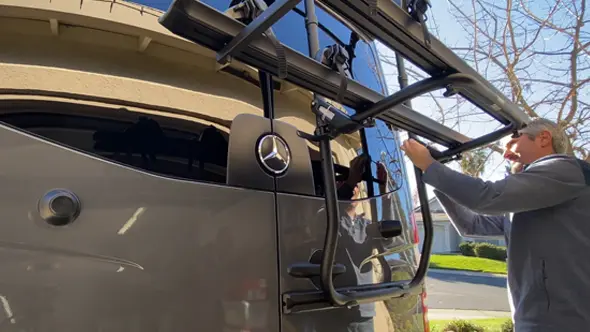
How Do You Get a Stuck Fiamma Bike Rack Off a Hitch?
If your Fiamma bike rack becomes stuck on your hitch, there are a few things you can try to remove it. First, try using a pair of pliers or a wrench to loosen the hitch pin. If the pin is difficult to reach, you may need to remove the bikes from the rack in order to access it.
Once the pin is removed, the rack should slide off the hitch with ease. If the rack is still stuck, try gently tapping it with a hammer until it loosens. Once you have successfully removed the rack, be sure to inspect it for damage and properly lubricate all moving parts before reattaching it to your hitch.
With these simple tips, you can easily remove your Fiamma bike rack without any issues.
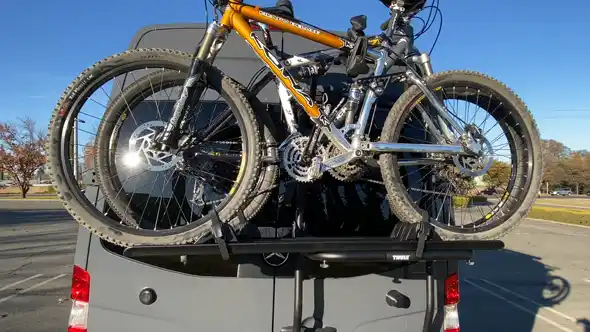
Can Fiamma Bike Racks Handle a Lot of Weight?
The answer depends on the model of the rack. The Fiamma Carry-Bike Pro C is designed for use with electric bikes and can accommodate up to 60 kg. The Carry-Bike Pro Light, on the other hand, is designed for use with traditional bicycles and has a maximum capacity of 50 kg.
So if you’re planning on using your Fiamma bike rack to transport your bike, be sure to choose the right model for your needs.
So, Let’s Get On With the Removal of the Bike Rack
We hope this article has helped provide you with all the information you need to successfully remove your bike rack. There are a few simple steps involved in the process, and as long as you follow them carefully, you should have no problem getting the job done.
Just make sure that you have the right tools for the job, and take your time to ensure that everything is done properly. With a little bit of effort, you should be able to get rid of your bike rack in no time. Thanks for reading.
Recommended Article To Read: