If you have a bike chain with a master link, removing the chain without disassembling the entire thing is easy. Master links are designed to be removable, and they make it easy to reconnect the chain later. However, removing the chain can be more difficult if you don’t know where the master link is. You’ll need to disassemble the entire chain in order to remove it. Here’s a quick guide if you’re not sure how to find a master link on a bike chain.
What Is A Master Link, And What Does It Do?
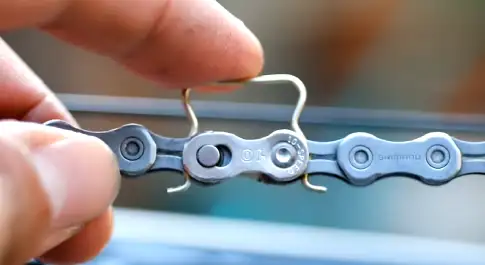
A master link is a small metal connector that holds two ends of a chain together. Master links come in two parts: the outer and inner plates. The outer container has teeth that fit into corresponding slots on the inner plate. The inner plate also has teeth that fit into slots on the outer plate.
The master link is what allows you to remove the chain without having to disassemble the entire thing. You need to remove the master link, and the chain will come apart. You can then reconnect the chain by putting the master link back.
How to Find a Master Link on a Bike Chain: Step-By-Step Guide
Here’s a quick step-by-step guide on how to find a master link on a bike chain:
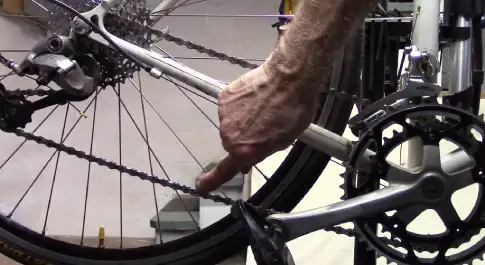
1. Set Your Bike:
Place your bike on a work stand or Flip the bike over to face up the chain.
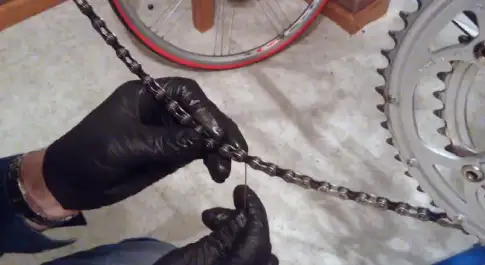
2. Examine The Chain:
Look closely at the chain and try to find the master link. The master link will have two plates with teeth that fit into corresponding slots on the other plate.
3. Check The Connections:
Disconnect one end of the chain and reconnect it if you are having trouble finding the master link. This will help you to identify which link is the master link.
4. Try The Master Link Tool:
If you’re still having trouble finding the master link, try using a master link tool. This tool is designed to help you remove the master link from the chain.
5. Check The Instructions:
If you’re still having trouble finding the master link, consult the bike’s owner’s manual. The manual should have instructions on how to remove the chain.
How to Remove a Bike Chain with a Master Link?
Once you’ve found the master link, removing the chain is a quick and easy process. Here’s a short guide on how to draw a bike chain with a master link:
1. Get Your Bike Ready:
Place your bike on a work stand or Flip the bike over to face up the chain.
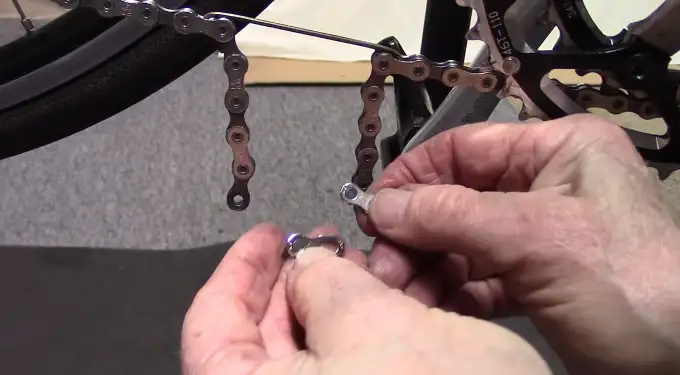
2. Open The Master Link:
Use your fingers to open the master link. You may need to use a pair of needle-nose pliers to help you spread the link.
3. Remove The Chain:
Once the master link is open, remove the chain from the bike. You may need to wiggle the chain a bit to get it off.
4. Reconnect The Chain:
Put the two ends together and close the master link to reconnect the chain. You may need to use needle-nose pliers to help you complete the connection.
5. Test The Chain:
Before you ride your bike, test the chain to ensure its secure. Try pedaling the bike and shifting through the gears. If the chain feels loose or comes off, adjust the master link accordingly.
Why Would I Want To Remove My Chain?
There are a few reasons you might want to remove your bike chain. Here are a few of the most common reasons:
1. Cleaning:
One of the most common reasons for removing a bike chain is to clean it. When you remove the chain, you can clean it more thoroughly. This will help to extend the life of the chain.
2. Repair:
If a link in the chain is damaged, you’ll need to remove the chain in order to repair it. Some links can be replaced, while others will need to be repaired with a chain tool.
3. Upgrading:
If you’re upgrading your bike, you may need to remove the old chain and install a new one. This is especially common if you’re upgrading to a different type of chain.
4. Replacement:
If the chain is worn out, you’ll need to remove it and replace it with a new one. For most bikes, you’ll need to replace the chain every 1,000 miles or so.
5. Storage:
If you’re storing your bike for an extended period of time, you may want to remove the chain. This will help to prevent the chain from rusting.
6. Shipping:
If you’re shipping your bike, you’ll need to remove the chain. This will help to prevent the chain from being damaged during shipping.
7. Maintenance:
If you’re performing maintenance on your bike, you may need to remove the chain. This will give you access to the bike parts that you need to service.
8. Troubleshooting:
If you’re having problems with your bike, removing the chain may help you troubleshoot the problem. By removing the chain, you can isolate the problem and find a solution.
9. Safety:
If you’re concerned about safety, removing the chain may help to ease your mind. By removing the chain, you can ensure that it doesn’t come loose and cause an accident.
10. Aesthetics:
If you want to customize the look of your bike, removing the chain can help you do that. You can add a different color chain or even remove the chain altogether.
How to Store a Bike Chain?
If you’re removing your chain for storage, there are a few things you’ll need to do to make sure it’s stored properly. Here are a few tips:
1. Clean The Chain:
Before you store the chain, make sure to clean it thoroughly. This will help to prevent the chain from rusting.
2. Lubricate The Chain:
Once the chain is clean, apply a light coat of lubricant. This will help keep the chain from rusting and make it easier to install when you’re ready to ride again.
3. Wrap The Chain:
Once the chain is lubricated, wrap it in a clean cloth. This will help to protect the chain from dirt and debris.
4. Store The Chain:
Store the chain in a cool, dry place. Avoid storing the chain in direct sunlight or in an area where it will be exposed to moisture.
5. Inspect The Chain:
Before you ride your bike again, inspect the chain to make sure it’s in good condition. If the chain is rusty or damaged, replace it with a new one.
You should have no trouble removing and storing your bike chain with these tips. By taking the time to remove and store your chain correctly, you can extend the life of your chain and keep your bike running smoothly.
FAQ’s
What Should I Do If the Chain Falls off While I’m Riding?
If the chain falls off while you’re riding, stop and inspect the chain. If the chain is damaged, replace it with a new one. If the chain is not damaged, you can try to reconnect it. If you can’t reconnect the chain, you’ll need to replace it.
How Often Should I Change my Bike Chain?
Most bikes will need a new chain every 2,000 miles or so. However, this can vary depending on the type of bike and the conditions it’s ridden in. If you ride in dirty or wet conditions, you may need to replace the chain frequently.
My Bike Chain Is Making A Noise. What Should I Do?
Make sure the bike chain isn’t making any noises. Replace the damaged chain with a new one if it is damaged. You will be able to adjust the damaged chain if it is still in good condition. You will need to replace the chain if you are unable to change it.
What’s the Best Way To Clean My Bike Chain?
The best way to clean your bike chain is to remove it and soak it in a degreaser. Once the chain is clean, apply a light coat of lubricant.
How Do I Know If My Bike Chain Is Worn Out?
If your bike chain is stretched or damaged, it’s time to replace it. You can use a chain checker tool to measure the wear on your chain. If the device indicates that the chain is worn, it’s time to replace it.
Conclusion
Now that you know how to remove and store your bike chain, you can keep your bike running smoothly for years to come. By regularly cleaning and lubricating your chain, you can prevent it from rusting or becoming damaged. And if something does go wrong, you now know how to fix it yourself. Thanks for reading.