Bike brakes are essential for a cyclist’s safety. When your brake handle is broken, it can be a significant inconvenience and even dangerous. Most bike brake handles are made of plastic and can be quickly snapped off in an accident. Fortunately, it is relatively easy to fix a broken bike brake handle with basic tools and materials.
This article will show you how to fix a broken bike brake handle in easy and simple steps and get back on the road in no time.
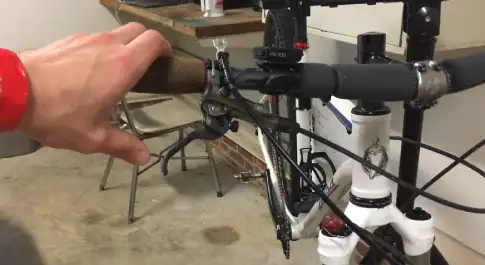
How to Fix a Broken Bike Brake Handle in 5 Easy Steps?
Before you start, make sure you have the following tools and materials.
Tools and Materials Needed:
- Phillips screwdriver
- Flathead screwdriver
- Pair of pliers
- Replacement brake handle (optional)
- Bike grease (optional)
Now you are ready to follow these five easy steps to fix your broken bike brake handle.
Step 1: Assess the Damage
The first step is to take a close look at the break and assess the damage. If the break is clean and the pieces fit together snugly, then you may be able to reattach the handle. However, if the break is jagged or the pieces do not fit together well, then you will need to replace the entire brake handle.
Step 2: Gather Your Tools
Next, gather the tools you will need to fix the brake handle. You will need a Phillips screwdriver, a flathead screwdriver, and a pair of pliers. If you are replacing the brake handle, you will also need a new brake handle and some bike grease.
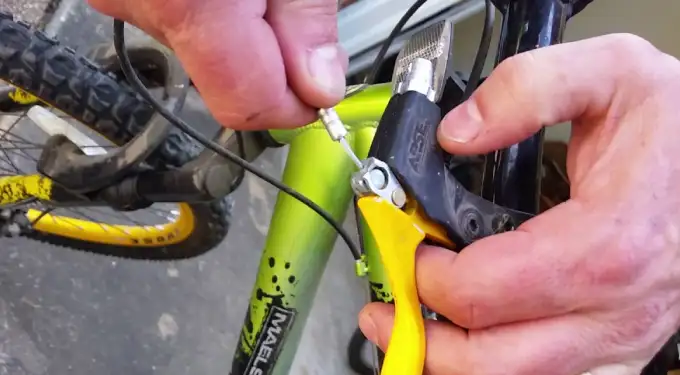
Step 3: Remove the Screws
If you are reattaching the brake handle, skip to Step 4. If you are replacing the entire brake handle, use the Phillips screwdriver to remove the screws that hold the old brake handle in place. There are usually two screws, one on each side of the handle.
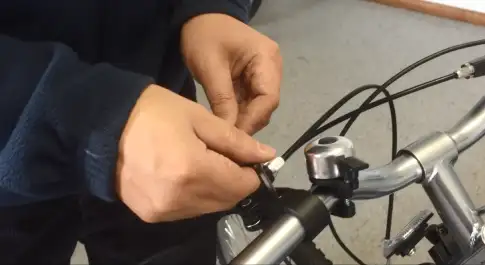
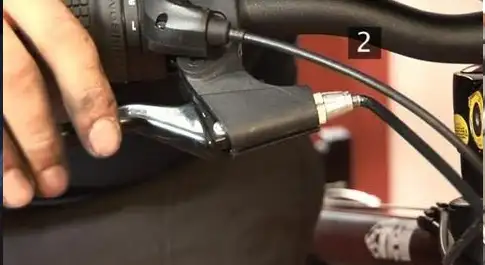
Step 4: Attach or Replace the Brake Handle
If you are reattaching the brake handle, line up the pieces and press them firmly together. If you replace the brake handle, slip the new handle into place and use the screws to secure it. Apply a small amount of bike grease to the screws before tightening them to prevent rusting.
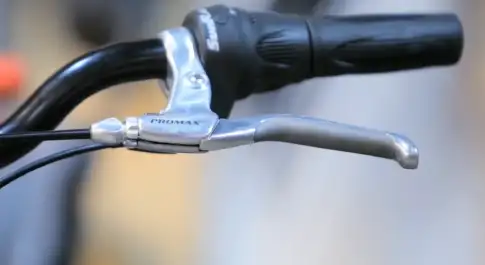
Step 5: Test the Brake Handle
Once the brake handle is attached or replaced, please test it out to ensure it is working correctly. Pump the brakes a few times to build up pressure and then squeeze the brake lever to see if the brakes engage. If they do not, check to ensure the handle is firmly attached and that there is no air in the line.
With these simple steps, you can quickly fix a broken bike brake handle and be back on the road in no time. So, next time your brake handle breaks, don’t panic, just follow these easy instructions, and you’ll be back in action in no time.
What are Common Brake Problems and How to Fix Them?
Bike brakes are crucial for a cyclist’s safety. However, they are often overlooked and not given the attention they deserve. As a result, bike brakes can develop problems that can be both dangerous and inconvenient. Here are some common brake problems and how to fix them.
1. Squealing Brakes
If your brakes are squealing, it is usually an indication that the brake pads need to be replaced. However, before you replace the brake pads, make sure they are not glazed. Glazed brake pads will have a shiny surface and will not grip the rotor properly. If your brake pads are glazed, sand them down with sandpaper until they are no longer shiny.
2. Brakes Not Working
If your brakes are not working, the first thing you should check is the brake cable. The brake cable may have come loose or been damaged. If the cable is intact, then the problem may be with the brake pads or rotors. Make sure the brake pads are not worn out and that the rotors are not damaged.
3. Brakes Not Responding
If your brakes are not responding properly, it could be an indication of air in the line. Use a wrench to loosen the brake bleeder screw to bleed the brakes. Next, depress the brake lever and hold it while tightening the bleeder screw. Repeat this process until the brakes are responding correctly.
4. Brakes Grabbing
If your brakes are grabbing, it is usually an indication of a problem with the rotor. The rotor may be warped or damaged. To fix this problem, replace the rotor.
5. Uneven Braking
If you notice that your bike is pulling to one side when you brake, it indicates uneven braking. This problem is usually caused by a build-up of dirt and grime on one of the brake pads. Simply clean the pads with a rag and some rubbing oil to fix this problem.
How Do You Maintain Your Bike Brakes?

Proper maintenance is the key to keeping your bike brakes in good working condition. Here are a few tips on how to properly maintain your bike brakes.
1. Keep Your Brakes Clean
One of the most important things you can do to maintain your bike brakes is to keep them clean. Dirt, grime, and road salt can all build upon the brakes and cause problems. To clean your brakes, use a rag and some rubbing alcohol.
2. Inspect Your Brakes Regularly
Another important thing you can do to maintain your bike brakes is regularly inspected them. Ensure the pads are not worn out and that the rotors are not damaged. Also, check the brake cable for any damage.
3. Replace Your Brakes When Necessary
One of the best things you can do to maintain your bike brakes is to replace them when necessary. Brake pads and rotors will eventually wear out and need to be replaced. When replacing your brakes, make sure to use the same type of pad and rotor.
4. Use the Right Brake Fluid
One of the most important things you can do to maintain your bike brakes is to use the right brake fluid. Different types of brake fluid have different boiling points. Make sure to use a brake fluid with a high boiling point to avoid problems.
5. Store Your Bike Properly
Your bike should be stored in a cool, dry place when not in use. Storing your bike in a damp garage can cause the brakes to rust and seize up.
FAQ’s
1. What are the Symptoms of a Broken Bike Brake Handle?
If your bike brake handle is broken, you will probably notice that the brakes are not working correctly. The lever may also feel loose or come away from the handle entirely.
2. What Causes a Bike Brake Handle to Break?
Brake handles can break for several reasons. Often, it is simply due to wear and tear. However, it can also be caused by an accident or a manufacturing defect.
3. Is It Safe to Ride with a Broken Bike Brake Handle?
It is not safe to ride with a broken bike brake handle. If the brakes are not working correctly, you could have an accident.
Conclusion
With this information in hand, you will be able to fix a broken bike brake handle on your own, so you can rest easy knowing that you can do it. Therefore, if you ever break the handle of your brake, do not panic, all you have to do is follow these simple instructions, and you’ll be back on the road in no time.