You’ll usually find the mobility scooter reset button near the battery pack under the seat or on the tiller by the handlebars or steering column.
It often looks like a small recessed red or black button, sometimes hidden under protective covers. To access it, lift the seat or check the control panel area carefully, using a flashlight if needed.
Knowing how to locate and use this button can help you quickly restore your scooter’s function. For detailed steps and troubleshooting, keep exploring.
Key Takeaways
- The reset button is commonly located near the battery pack under the scooter seat.
- It may also be found on the tiller, near the handlebars or steering column.
- Some models have the reset button inside the control panel or near the display interface.
- Reset buttons often appear as small recessed circuit breaker-style switches, sometimes under protective covers.
- Use a flashlight to inspect battery compartments or tiller areas for hidden or recessed reset buttons.
Mobility Scooter Reset Button Locations
When you need to locate the reset button on your mobility scooter, start by checking near the battery pack, under the seat, or on the control panel.
Many models place the reset control close to electrical components grouped under the seat for convenient access.
Reset buttons are often located near electrical parts under the seat for easy and convenient access.
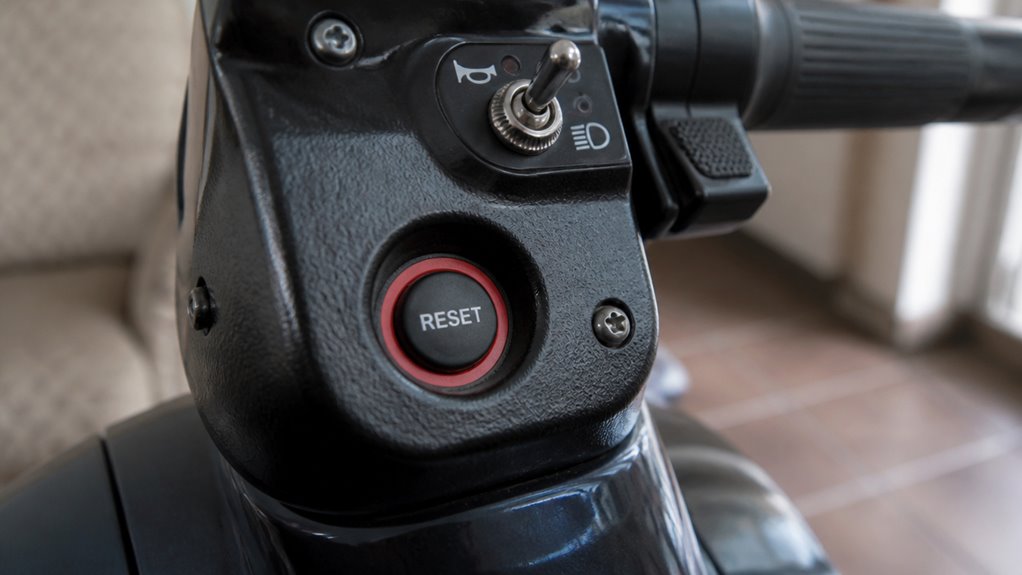
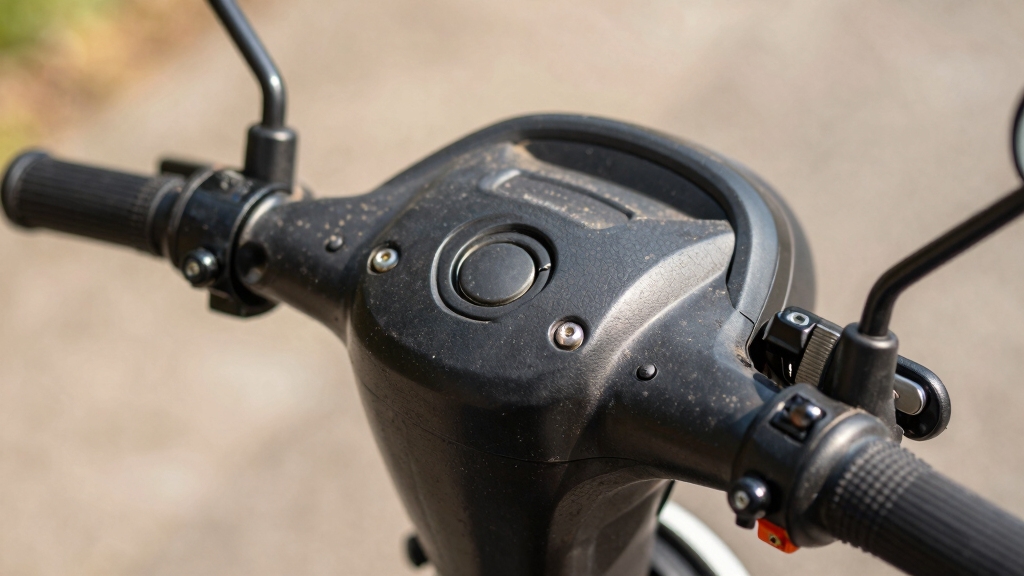
Some scooters position the reset button on the tiller, near the handlebars or steering column, allowing easier reach without opening compartments.
A few models use a recessed circuit breaker-style button rather than a traditional reset switch, so look carefully for small red or black buttons.
Because placement varies widely by make and model, you should always consult your user manual for exact location details.
This approach makes certain you identify the reset button accurately and avoid unnecessary disassembly or damage.
If you are troubleshooting charging issues, performing a BMS soft reset by powering off the scooter, unplugging the charger, and holding the power button for several seconds can help resolve minor electronic glitches.
Accessing the Reset Button Under the Seat and Battery Pack
To access the reset button under the seat or near the battery pack, you’ll typically need to lift the seat or remove a panel covering the battery compartment. The button may be small, recessed, and colored red or black for protection.
Use a flashlight if visibility is low. Carefully inspect the battery pack’s sides or bottom to locate this button. Press it firmly, often with a pointed tool if recessed, to reset the system.
Many modern mobility scooters feature removable batteries, which facilitate easier access and maintenance of the reset button.
| Step | Action | Tip |
|---|---|---|
| Lift the seat | Reveal battery compartment | Use gentle force |
| Locate button | Check sides/bottom of battery | Look for small red/black dot |
| Use flashlight | Illuminate dark spaces | Improves visibility |
| Press reset button | Hold for a few seconds | Use pen if recessed |
Reset Button Locations on the Tiller and Control Panel
You know, the reset button on the tiller is usually located near the handlebars or the steering column. This makes it super easy to access when you need it quickly.
On some scooters, they’ve actually integrated the reset function right into the control panel. How convenient is that?
For safe transport, it’s important to secure loose cables around the control panel to prevent snagging or damage during transit.
Tiller Reset Button Placement
Although most mobility scooter reset buttons are located near the battery pack, several models position the reset control on the tiller or control panel for easier access.
On these scooters, you’ll typically find the reset button near the handlebars or along the steering column, sometimes under a protective cover to prevent accidental presses.
This placement lets you reset the scooter without lifting the seat or accessing the battery compartment.
The button may resemble a small, recessed circuit breaker switch, requiring a firm press or a press-and-hold action.
Because location varies by make and model, consult your user manual to identify the exact spot on the tiller.
Accessing the reset button here streamlines troubleshooting by reducing the need for tools or disassembly during resets.
Many scooters feature protective covers over reset buttons to shield them from moisture and debris, preserving their functionality.
Control Panel Integration
When a reset button is integrated into the control panel on the tiller, it offers a streamlined way to manage electronic faults without accessing internal components.
You’ll usually find this button near the handlebars or embedded within the display interface. This placement enhances convenience, letting you reset the scooter quickly if it encounters an overload or error.
Some models feature a protective cover over the button to prevent accidental presses. Control panel integration eliminates the need to lift the seat or open battery compartments.
To reset, you typically press and hold the button for several seconds until you hear a click or notice a system response. Always consult your user manual to make certain you’re following the correct procedure for your specific scooter model.
Performing a reset may also help resolve common issues caused by loose wiring or corroded contacts as noted in troubleshooting guides.
How the Reset Button Works and When to Use It?
You know that reset button on your scooter? It’s super handy for getting things back to normal after an electrical fault or overload. To use it, just press and hold the button until you hear a click or feel it respond.
But remember, before you do that, it’s important to turn off the scooter and unplug the charger. This little step helps avoid any potential damage.
Once you’ve pressed the reset button, go ahead and power the scooter back on.
After that, take a moment to test its functions and make sure everything’s working smoothly again!
For enhanced safety, some models also feature electromagnetic braking systems that automatically engage when the joystick is released.
Reset Button Functionality
Understanding the reset button’s functionality is essential for restoring your mobility scooter’s normal operation after experiencing an electrical fault or system error.
When you press the reset button, it interrupts the power flow briefly, resetting the electronic control system or circuit breaker. This action clears fault conditions such as overloads or short circuits, allowing the scooter’s systems to recalibrate.
Some models require you to press and hold the button for several seconds, while others respond to a quick press. You may hear a click confirming the reset in circuit-breaker-style units.
After resetting, you must power the scooter back on to verify functionality. Proper use of the reset button prevents electrical damage and helps maintain safe operation, making it an indispensable component in your scooter’s fault-recovery process.
For best results, it is advisable to perform a thorough electrical system troubleshooting if resets become frequent to identify underlying issues.
When To Press?
Knowing how the reset button functions sets the stage for recognizing the appropriate moments to press it. You should press the reset button after the scooter experiences an electrical fault, overload, or system error that disrupts normal operation. This action restores the electronic system or resets the circuit breaker. It is also important to ensure your scooter’s batteries comply with airline battery restrictions to avoid complications during travel.
| Situation | When to Press |
|---|---|
| Electrical fault detected | Immediately after powering off scooter |
| Overload or system overload | After disconnecting the charger |
| Sudden loss of power/function | Before restarting the scooter |
Press and hold the button for several seconds, often using a tool if recessed. Avoid pressing it unnecessarily, as frequent resets may indicate underlying issues needing professional attention.
Post-Reset Steps
Once you’ve pressed the reset button, the scooter’s electronic systems reboot to clear faults or overloads that interrupted operation. This process restores the circuit breaker or control module to normal function, allowing the scooter to resume operation.
After resetting, power the scooter back on and verify that all functions, including throttle response, brakes, and display indicators, work correctly. If your scooter requires a press-and-hold reset, maintain pressure for the specified time, usually several seconds, to activate the reset fully.
Use the reset button only after turning the scooter off and disconnecting any charger. If issues persist despite resetting, inspect battery connections and charge level or consult professional service. Proper post-reset steps guarantee safety and prevent further electrical faults.
For optimal safety and battery longevity, always use manufacturer-approved chargers during charging and maintenance.
How to Reset Your Mobility Scooter in 5 Easy Steps?
To reset your mobility scooter, start by powering it off completely and unplugging any charger connected to it.
Next, locate the reset button, usually found near the battery pack under the seat or on the tiller by the handlebars.
If necessary, lift the seat or remove the panel to access the button.
Then, press and hold the reset button for several seconds; use a pen or small tool if the button is recessed.
After releasing the button, power the scooter back on.
Finally, test the scooter’s functions to confirm normal operation has resumed.
Following these precise steps helps restore the scooter’s electronic systems after faults or overloads, ensuring safe and reliable use without risking damage.
For best results, ensure the battery is fully charged and properly maintained to support optimal battery capabilities and range.
Troubleshooting Common Mobility Scooter Reset Button Problems
Start troubleshooting your mobility scooter’s reset button by confirming its exact location using the user manual or manufacturer resources. Button placement varies widely among models.
Begin troubleshooting your mobility scooter’s reset button by locating it through the user manual or manufacturer guides.
Common spots include near the battery pack under the seat, on the tiller, or within the control panel. If you can’t find the button, look for a recessed circuit breaker-style switch.
Use a flashlight when checking under the seat or inside battery compartments. Make certain the scooter is off and disconnected from power before pressing the reset.
If the button is recessed, use a small tool to press and hold it for several seconds. Should resetting fail, inspect battery connections and charge level, as these can mimic reset issues.
Accurate diagnosis prevents potential damage and ensures proper function restoration.
When to Seek Professional Help After Resetting?
Although resetting your mobility scooter can resolve many common electrical faults, you should seek professional help if the scooter fails to operate normally afterward or exhibits persistent issues such as intermittent power loss, unusual noises, or error indicators.
Repeated resets without improvement often indicate deeper electrical or mechanical problems beyond user-level troubleshooting. If the scooter’s motor stalls, the battery drains unusually fast, or controls respond erratically, a qualified technician should inspect it.
Avoid attempting internal repairs yourself, as improper handling risks voiding warranties or causing damage. Additionally, if you notice visible damage to wiring, connectors, or battery components during reset attempts, discontinue use immediately and consult a professional service to guarantee safety and restore reliable function.
Frequently Asked Questions
Can a Reset Button Cause Permanent Damage if Pressed Incorrectly?
No, pressing the reset button incorrectly typically won’t cause permanent damage. It’s designed to restore normal function after faults or overloads.
However, repeatedly forcing or using excessive pressure could harm the button or internal components. Always power off the scooter first and follow manufacturer instructions carefully.
If you’re unsure, consult the user manual or a professional to avoid accidental damage or voiding warranties during reset attempts.
How Often Should I Reset My Mobility Scooter for Maintenance?
You should only reset your mobility scooter when necessary, such as after an electrical fault or system error. Notably, over 70% of scooter malfunctions are resolved by a simple reset, highlighting its importance.
Routine resets aren’t part of regular maintenance; instead, focus on battery care and inspections. Overusing resets can mask underlying issues, so reserve resets for troubleshooting. Always follow the manufacturer’s guidelines to avoid potential damage or voiding warranties.
Are Reset Buttons Standardized Across All Mobility Scooter Brands?
No, reset buttons aren’t standardized across all mobility scooter brands. You’ll find variations in location, design, and operation depending on the make and model.
Some place it near the battery pack, others on the tiller or control panel. The button’s size, color, and whether it’s recessed also differ.
You should always consult your scooter’s user manual or manufacturer resources to locate and properly use the reset function specific to your model.
Can Resetting Affect the Scooter’s Warranty or Service Agreement?
Resetting your mobility scooter typically won’t void the warranty or service agreement, as it’s a standard troubleshooting step.
However, if you perform unauthorized repairs or cause damage while resetting, that could affect coverage.
Always follow the manufacturer’s instructions precisely.
If unsure, check your warranty terms or consult customer support before resetting.
Proper use of the reset button maintains your warranty and helps guarantee safe, reliable scooter operation.
Is There a Way to Disable the Reset Button for Safety Reasons?
Disabling the reset button isn’t common as it serves a vital safety function. Over 60% of electrical faults in scooters are resolved by resetting.
However, you can consult the manufacturer or a qualified technician to explore options like covering the button with a protective shield or using tamper-resistant screws.
Completely disabling it’s generally not recommended since it risks voiding warranties and compromising safety by preventing necessary electrical resets during faults or overloads.
Resetting Your Mobility Scooter: A Simple Guide to Troubleshooting
Now that you know where to find the reset button, under the seat, near the battery pack, or on the control panel, you can confidently troubleshoot common issues.
You’ll understand how to reset your mobility scooter in five simple steps, recognize when the reset button isn’t enough, and identify when professional help is necessary.
Stay proactive, stay informed, and keep your mobility scooter running smoothly with these precise, easy-to-follow guidelines.