
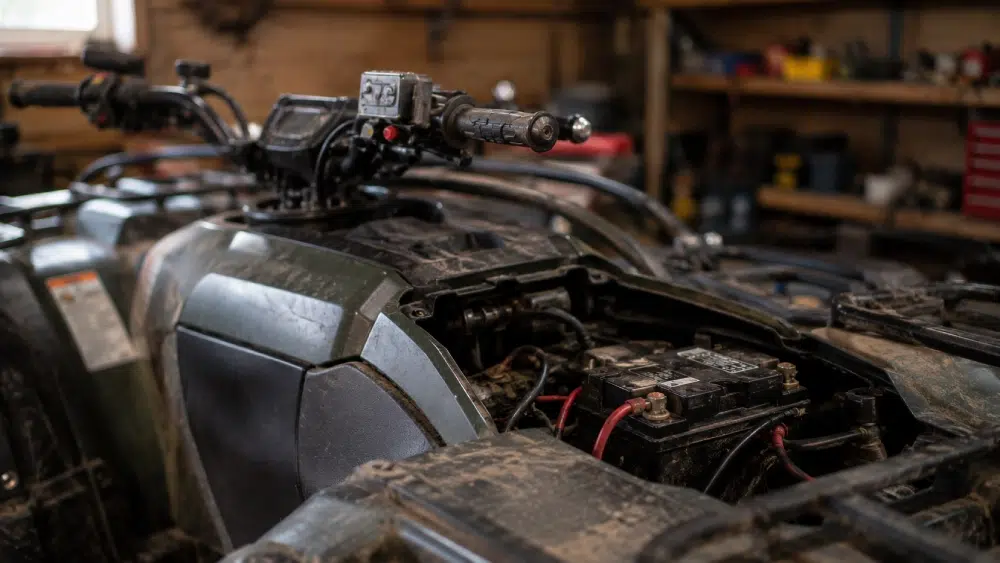
If your quad won’t start with electric start, first check the battery voltage. It should read around 12.6 volts or higher.
Inspect ignition switches, relay clicks, and safety interlocks like the kill switch or handlebar sensors. These can block starting.
Also, test the solenoid, starter motor brushes, and wiring for faults. Mechanical issues like worn starter gear teeth can prevent engagement.
Troubleshooting these areas helps pinpoint the problem. Exploring further reveals detailed fixes and preventive steps.
Key Takeaways
- Check battery voltage; below 12.5 volts often means insufficient power for electric start.
- Listen for relay click when pressing start button; no click may indicate faulty relay or ignition switch.
- Verify kill switch and safety interlocks (seat, handlebar) are disengaged to allow starter activation.
- Inspect starter motor and solenoid for worn brushes, stuck contacts, or damaged gears preventing engagement.
- Confirm wiring integrity, clean battery terminals, and test voltage at relay coil during start button press.
How to Diagnose Electric Start Problems on Your Quad?
Where do you begin when your quad won’t start with the electric starter? Start by isolating the problem step-by-step.
First, check the ignition switch and relay: press the start button and listen for a clicking relay. No click means the relay coil or switch may be faulty.
Begin by pressing the start button and listening for a relay click to check the ignition switch and relay.
Inspect the starter interlock and handlebar switches for proper connection. Verify the fuse and fuse box integrity to make certain 12 volts reach the relay circuit.
Next, examine the solenoid and starter motor: worn contacts, broken gears, or internal shorts can prevent activation despite proper voltage.
Test continuity across solenoid terminals and check starter motor brushes for wear.
For safety during troubleshooting, always wear protective gloves to prevent injury from electrical components or moving parts.
Checking Your Quad’s Battery and Voltage Levels
Begin by measuring your quad’s battery voltage with a reliable multimeter. A fully charged battery should read around 12.6 volts or higher.
If the voltage falls below 12.5 volts, your battery likely needs replacement. Next, inspect battery terminals for corrosion or loose connections, as these cause resistance and hinder current flow to the solenoid.
Check wiring between the battery and the voltage regulator; broken or damaged wires disrupt power supply, preventing proper starting. While the engine is running, measure voltage regulator output—it should be close to 14 volts.
Variations exceeding 2 volts suggest a faulty regulator, which can drain or undercharge the battery. Ensuring solid battery voltage and clean, secure connections is essential before diagnosing further electric start problems.
Additionally, be aware that battery age and condition significantly affect voltage levels and starting performance, as older batteries have increased internal resistance that can impede proper starting.
How to Spot Ignition Switch and Relay Issues?
Although your battery and voltage may seem fine, ignition switch and relay problems can still prevent your quad from starting.
First, check if the push button switch properly connects the relay coil to the battery’s negative post when pressed. A faulty starter interlock or a broken connection between the left handlebar switch terminals (O to O/W) can also block activation.
Listen for a clicking sound from the relay; silence may indicate the coil isn’t energizing or the armature is stuck. Inspect the fuse box for blown fuses disrupting the 12-volt supply to the relay circuit.
Use a multimeter to verify continuity across ignition switch terminals and check if voltage reaches the relay coil when the start button is engaged. Addressing these points helps isolate ignition switch or relay faults effectively.
Additionally, testing the stator’s AC voltage output can help rule out charging system issues that might affect starting.
How to Test Your Voltage Regulator and Relay?
To test your voltage regulator and relay, start by disconnecting the battery to avoid shorts. First, visually inspect the regulator for corrosion or damaged wires.
Begin testing your voltage regulator and relay by disconnecting the battery and inspecting for corrosion or damaged wires.
Next, use a multimeter to check voltage output from the regulator; expect around 14 volts when the engine runs. For the relay, listen for a click when pressing the start button, indicating coil activation.
Test the relay coil resistance with a multimeter; it should match manufacturer specs, usually a few ohms. Measure voltage drop across relay terminals; it should be minimal.
Confirm continuity between relay input and output when energized. Check for consistent voltage at the regulator’s input and output under load.
These steps help pinpoint faults in your quad’s charging and starting circuits efficiently. Additionally, inspecting all electrical connections for corrosion and looseness can prevent intermittent faults and ensure proper current flow.
Identifying Solenoid and Starter Motor Failures
Check the solenoid and starter motor carefully when your quad won’t start despite having proper voltage at the battery and relay.
First, test solenoid contacts for continuity. Worn or stuck contacts won’t connect terminals when the key is pressed.
Listen for a clicking sound; absence often indicates solenoid failure.
Next, inspect the starter motor gear for damage or broken teeth that prevent engagement with the flywheel.
Measure continuity across the solenoid’s heavy terminals. Poor readings suggest internal contact faults.
Also, check the starter motor brushes. Worn brushes disrupt current flow through motor coils, stopping motor rotation.
Finally, consider internal shorts within the starter motor, which can cause it not to turn over even if voltage is present.
Address these issues before moving to wiring checks.
Low compression issues can also affect starting performance, so consider checking compression levels if electrical components are functioning properly.
Troubleshooting Wiring and Connection Problems
When your quad won’t start despite a functional solenoid and starter motor, wiring and connection issues often cause power interruptions.
Begin by inspecting all wiring harnesses for damage, corrosion, or rodent bites that could cut circuits. Check battery terminals for looseness or corrosion, which can cause voltage drops under load.
Also, verify all ground wires are securely connected to the engine casing to complete the circuit.
Focus on these key checks:
Inspect wires between voltage regulator and battery for resistance or breaks. Tighten and clean battery terminal connections to guarantee solid contact.
Measure voltage drop between regulator output and battery; it shouldn’t exceed 2 volts.
Additionally, ensure that any charging or jump-starting method uses a smart charger with appropriate amperage settings to prevent battery damage.
Addressing these wiring faults will restore reliable power flow and help your electric start function properly.
Fuel System Problems That Stop Quad Electric Start
Although the electric start system relies heavily on electrical components, fuel delivery issues can prevent your quad from starting.
Fuel delivery problems can stop your quad from starting, even with a fully functional electric start system.
A clogged fuel filter or blocked carburettor restricts fuel flow, starving the engine of necessary combustion material.
Check the carburettor needle valve, as it can stick and block fuel entry into the combustion chamber.
Additionally, a blocked air intake system limits airflow, disrupting the fuel-air mixture needed for ignition.
Inspect the fuel lines for leaks or kinks that might reduce pressure.
While the electric starter may engage and crank the engine, insufficient or no fuel delivery will prevent ignition.
Regularly clean or replace fuel filters, verify carburettor function, and ensure unobstructed air intake to maintain reliable electric start operation.
Performing routine carburetor cleaning helps prevent blockages and ensures consistent fuel flow for successful engine starts.
How Safety and Kill Switches Block Electric Start?
Since safety and kill switches serve as critical safeguards, they can prevent your quad from starting even if the ignition and electrical systems are otherwise functional.
These switches interrupt the starter circuit to avoid unsafe operation conditions. If engaged or faulty, they block the electric starter from activating.
Check these common points:
Kill switch engaged: This immediately cuts power to the ignition system, disabling the starter.
Safety interlock switch: Located on the seat or handlebar, it must be activated to allow starting.
Reverse gear or throttle position sensor faults: These can prevent the starter from engaging when the quad is in reverse or throttle is improperly positioned.
Always verify these switches’ status and wiring before troubleshooting other electrical components. Additionally, some models may require a reset procedure to clear electronic faults that could also block the electric start function.
Repairing a Broken Starter Motor Gear
Sure! Here’s a more conversational version of your text:
First things first, take a good look at the starter motor gear. You want to check for any visible damage, like worn or broken teeth. If you find that the gear is indeed faulty, it’s important to replace it with one that’s an exact match. This way, you can ensure it engages properly with the flywheel.
Oh, and to avoid running into similar issues down the line, make sure to check the alignment. Also, try not to use the starter excessively, as that can really put a strain on the gear. Taking these steps can help keep everything running smoothly! Additionally, maintaining the correct motorcycle positioning during repairs can improve safety and precision.
Identifying Gear Damage
Inspect the starter motor gear carefully if your quad won’t start and you suspect mechanical engagement issues. Damage to this gear often prevents it from meshing correctly with the engine flywheel teeth, stopping the engine from cranking.
Look for signs including:
- Missing or chipped teeth on the gear, which cause slipping or failure to engage.
- Excessive wear or deformation that affects gear alignment and engagement.
- Metal shavings or debris around the gear indicating grinding or improper contact.
You’ll want to clean the gear and surrounding area to get a clear view. If you spot any of these issues, it confirms mechanical damage to the starter gear.
This diagnostic step is essential before moving on to replacement or further repair. Additionally, when working on the starter motor gear, it’s important to lift from the frame to avoid causing further damage during maintenance.
Replacing Starter Motor Gear
When you identify damage to the starter motor gear, the next step is to replace it to restore proper engagement with the engine flywheel.
First, disconnect the battery to avoid electrical hazards.
Remove the starter motor from the quad by unbolting it from the engine casing.
Carefully detach the damaged gear from the starter shaft, noting any retaining clips or fasteners.
Install the new starter motor gear, ensuring it meshes correctly with the shaft and retaining mechanisms.
Before reinstallation, inspect the flywheel teeth for wear or damage that could affect engagement.
Reattach the starter motor securely to the engine, reconnect the battery, and test the electric start function.
Replacing the gear restores reliable starter operation, eliminating mechanical failure as a cause of non-start issues.
Preventing Future Gear Failures
Although replacing a broken starter motor gear fixes the immediate problem, taking steps to prevent future failures will save you time and expense. You need to maintain the starter system rigorously to avoid repeated damage.
Start by guaranteeing the battery voltage stays above 12.5 volts to provide consistent power. Check the solenoid and starter motor for wear, particularly the brushes and contacts, and replace them if necessary.
Finally, inspect wiring and connections regularly to prevent voltage drops and intermittent engagement issues.
Keep the battery charged and terminals clean to guarantee proper current flow. Lubricate the starter gear and flywheel teeth lightly to reduce wear.
Avoid prolonged starter engagement to prevent overheating and premature gear failure.
Inspecting and Cleaning Battery Terminals and When to Replace Key Starting Components
Since battery terminals often accumulate corrosion or loosen over time, you should regularly clean and tighten them to guarantee a reliable connection.
Use a wire brush and a mixture of baking soda and water to remove corrosion. Then dry the terminals before reattaching the cables securely.
Check for voltage drops or weak cranking amps. A reading below 12.5 volts signals battery replacement.
Inspect key starting components like the ignition switch, relay, solenoid, and starter motor for wear or damage.
Replace any parts showing signs of failure, such as worn solenoid contacts or faulty relay coils, to prevent intermittent starting issues.
Regularly testing these components with a multimeter assures you catch problems early. This maintains efficient power flow and reliable electric start operation for your quad.
Frequently Asked Questions
Can Cold Weather Affect My Quad’s Electric Start Performance?
Yes, cold weather can affect your quad’s electric start.
Low temperatures reduce battery efficiency, dropping voltage and cranking amps below needed levels.
Thickened engine oil and increased internal resistance make the starter motor work harder.
You might notice sluggish or no response when pressing the start button.
To improve performance, keep the battery charged and consider using a battery warmer or synthetic oil designed for cold conditions.
How Often Should I Perform Maintenance on My Quad’s Electric Start System?
You should perform maintenance on your quad’s electric start system at least every 3 months or every 500 miles, whichever comes first.
Neglecting it could turn your quad into a silent statue overnight.
Regularly check battery voltage, clean terminals, inspect wiring for corrosion or damage, and test the starter relay and solenoid.
Keeping these components in top shape prevents unexpected failures and guarantees reliable starts every time you hit the ignition.
Does Using a Battery Charger Damage the Quad’s Battery or Electric Start?
Using a battery charger won’t damage your quad’s battery or electric start if you use the correct charger and settings.
Avoid overcharging by selecting a charger with automatic shutoff or float mode.
Always match the charger voltage to your battery, usually 12 volts.
Overcharging or using a high-current charger can harm the battery’s life and potentially affect the electric start system’s performance over time.
Monitor charging for safety and battery health.
Can Aftermarket Parts Impact the Reliability of My Quad’s Electric Start?
Aftermarket parts can be a double-edged sword for your quad’s electric start.
While they might save you money, they often don’t fit like a glove, causing unreliable connections or improper voltage flow.
You could face issues like solenoid failure or relay malfunctions due to subpar components.
Always choose high-quality, compatible parts to keep your starting system crisp and reliable, avoiding headaches down the trail.
How Long Should I Hold the Start Button Before Releasing It?
You should hold the start button for about 5 to 10 seconds. If the engine doesn’t crank within this time, release the button to avoid overheating the starter motor or draining the battery.
Wait at least 30 seconds between attempts to allow the starter and battery to cool down. Prolonged pressing can cause damage, so keep your attempts short and spaced out for safe electric start operation.
The Key to Fixing an Electric Start Quad
Think of your quad’s electric start system as a finely tuned clock. Each component must work in harmony to bring it to life.
When it won’t start, you’re facing a broken link in that chain, be it battery, ignition, or fuel flow.
By methodically diagnosing and addressing these key parts, you’ll restore the spark that sets your quad’s engine turning.
Keep your system clean and connections tight, and you’ll guarantee smooth starts every time.